

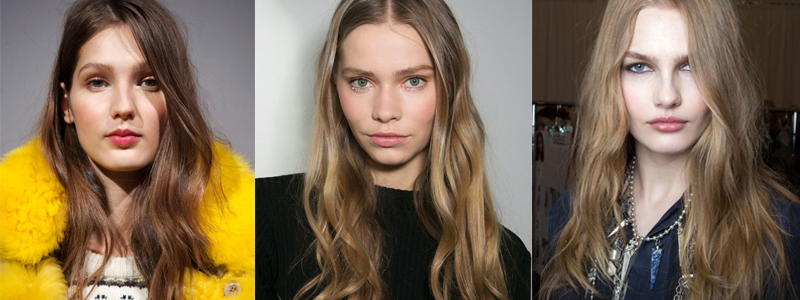
//images via.//
Oh, man. Here we goooo. I made a vid-e-ooooo…and a hair tutorial at that.
yikes.
The How-to
* I forgot to mention in the video (ooph. I’m learning) that it’s important to not curl the very ends of your hair. As you may have seen, I wrapped only the middle of the hair sections around the barrel. That will help with giving you a more relaxed, easy wave look.
The Tools

Are there any other simple kinds of everyday hair or outfit styling video tutorials you’d like to see?…with me fumbling around in front of the camera pretending to know what I’m talking about? Sounds awesome, yeh? Hair is something I…don’t do. I usually just brush, spray something in my hair and hope it looks good. Yep. This could be a real adventure for me…and for you. For all of us, really. 😉
In the meantime, while you’re waiting for me to blow you out of the water with my next basic tutorial (har har), find us over on Youtube. We do cool stuff.
Cheers,
Cams







Great video, Cam.
If anyone’s interested in a no heat (no damage) option, or like me, you’re curling iron challenged. I’ve had good results with barrel size Curlformers. There’s a bit of a learning curve, but I like them. I have wavy/curly hair so these straighten and curl at the same time. I accidentally achieved this look when I ordered ones that were too short for my hair; my ends stick out the bottom. It’s kinda too curly at first but I just wrap it in a bun to loosen the curl.
Then to sleep, I wrap half my hair in a tight bun high on my head, and the other half directly behind it. This helps hold a similar curl on subsequent days.
I only wash my hair every fourth day or so. Dry shampoo is amazing! I love powdered versions because they have more natural ingredients vs spray ones. I like the SkinnySkinny dry shampoo. Apply it to the roots with a makeup brush.
I’ve become a hair geek lately. Been trying lots of stuff. But I have really long (17-18″) hair so my techniques might not work for everyone.
LOVE this, Christy. I hadn’t even considered a no heat option. I want to add those curlformers to the post now. Thanks!
Just a tip – you really must buy the drying hood with the curlers. Depending on your hair, it takes hours to dry otherwise. Also, to reduce drying time, I bought one of the extra packs of curlers so I could put less hair in each one.
The whole set up can be expensive (I got some stuff on sale and paid about $100 for everything) but for someone like me with long, curly, color treated hair (a perfect storm for hair damage) it’s worth it to have healthy hair.
Love this, you’re a natural. I have a similar hair type and style and can’t wait to try it. All the other curling iron tutorials look like way too much effort, but this looks actually doable (with my toddler in the background, no less)! Plus you have a good vibe and made me feel better on a crappy day. Keep ’em coming!
Cheers, Mary! I felt funny talking…b/c usually all I have to do is type. lol! I hope it works for you! I would say, definitely invest in a really good hair spray. Otherwise, it doesn’t last longer than a couple of hours.
The Bumble and Bumble Does It All hairspray is legit. Probably my favorite ever.
YESSSSSS. Now I can feel good about buying the pretty bottled products! 😀 Haha. Thanks, Bethany!
THANK YOU for this tutorial. I have watched dozens of curling tutorials and this is the first one I’ve ever tried. I’ve done it three times now, twice with my toddler in the room. I use Amika un.done texture spray before, then curl with my curling wand (which had been collecting dust for 1.5 years). I think I mastered it today which feels like a big deal, ha. My fine, straight hair has waves! More like this!!
YESSS. Loved hearing this. Thank you for letting me know that it worked for you! I’m still trying to come up with my next video (has to be easy and quick, so that’s the real stumper), so we’ll see. Cheers.